-
Written By Mithilesh Kr Tata
-
Updated on June 26th, 2018
Table Of Content
How to Open OLM File of Mac Outlook & Export into Windows Outlook 2016, 2013, 2010 & 2007 PST File
Microsoft Outlook is a flexible email client that can be used on Mac as well as on Windows. It creates the different type of file format ie, OLM in Mac and PST in Windows. It is noticed that many users import OLM files into PST files easily.
The Outlook 2011 was introduced for Mac users which specifically stores the data file in the OLM file format. Its purpose, working features and usage is entirely similar as of Windows Outlook. It is different in terms of file format only.
But when it comes to open OLM file of Mac Outlook in Windows Outlook it is unsupportive. Hence users left with only one solution and that is OLM to PST Conversion. For example, If a user has switched from Mac to Windows then it will be difficult to open OLM files in window’s version.
In this blog, I have brought to you some effective ways to open OLM files of Mac Outlook and export them into Windows Outlook PST File.
Export OLM files into Windows Outlook- Manually
Before using the manual approach for OLM to PST Conversion, you need to locate the physical OLM file. By default, OLM can be found on these two below mentioned system locations.
DocumentsMicrosoft User DataOffice 2011 IdentitiesMain IdentityDatabases
Or,
DocumentsMicrosoft User Data MS Office 2011 IdentitiesMain IdentityData-RecordsMessage
After navigating to the above hard disk location, you cannot locate OLM files physically. Therefore to access these files you need to create it by saving the mailbox data in OLM format. How? Follow the given steps,
Step 1. Click on File and then select Export from the drive location. This way you will intend to open a new Export window.
Step 2. Select entire data which is displayed at the location.
Step 3. From the given options, Check “Do not want to delete item”
Step 4. Now go to Save As option, select the destination location. Click save.
Once the OLM file creation did successfully, then it will be converted into PST format using the below-mentioned steps
Tip – IMAP Server will work here as an intermediate between Mac and Window Outlook. This method is quite similar to use it as a storage device between two computer system for copying the existing files. Since IMAP server can receive remote files therefore, it is used more wisely.
#STEP 1. Create Gmail account
#STEP 2. Configure Mac Outlook with Gmail
- Open Outlook>>Select Accounts
- From the Accounts Window, Click “+” Button, to add a new account
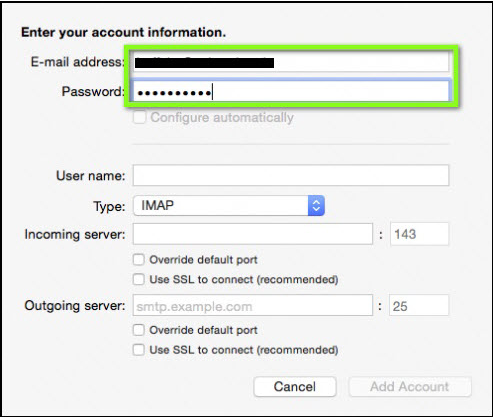
- Choose the email address pane
- Now give essential details for Gmail account
- Select Incoming server as “imap.gmail.com”
- Check “Use SSL connect” from the options
- Enter “smtp.gmail.com” as the Outgoing Server
- Check both the options from Outgoing Server
- Give outgoing port no. to be 45, click on Add account
A yellow button can be observed which says that the connection is being made. If it turns to green then your password keyed is correct and a connection is successfully activated
#STEP3– Migrate Mailbox from Mac to Gmail
- Select the folder which is needed to migrate and click on copy
- Select the desired folder in Gmail
- Watch the navigation bar, it shows uploading messages
- Once uploading gets completed, Refresh your account.
#STEP4- Now it’s time to configure Gmail account with Windows Outlook
- Open Outlook>>Click on file>> Info>> Account Settings
- In new pop up window, Click “New” icon
- Check “Additional Server type”
- Check “Internet Email” and fill the required details

- Select Account type- “IMAP”
- Select the Incoming server to be “imap.gmail.com”
- Select Outgoing server as “smtp.gmail.com”
- Select “more settings”, then in Outgoing server tab choose, “My Outgoing server requires authentication”
- In the “Advanced” tab, enter Incoming Server Port as “993”

- Select encryption type as “SSL”
- Enter “465” as the Outgoing Server Port and Click OK
- Now, Select “Test Account Settings” and click on “Finish”
#STEP5– Migrate Mailbox data from Gmail to Outlook
- Sign in to Gmail account and click on “Settings”
- Select “Forwarding and POP/IMAP”
- In “IMAP Access” select “Enable IMAP”
- Enable “Auto-Expunge On” if needed
- Enable “Archive” if you are willing to archive your messages
- Click on Save changes
- Now Open your Outlook and click on “Send/Receive messages
This is the way through which you will be able to Open OLM files of Mac Outlook in Windows Outlook
Smartest approach to Export Mac Outlook in Window Outlook
The above mentioned manual steps are quite lengthy and complex method which will be tough for non-technical users. Hence to export OLM files in PST format in a simple, easy and risk-free method to use the third-party tool.
Thus to Export Mac Outlook in Windows use OLM to PST Converter tool. It will convert OLM files into PST file format safely and securely without harming the original data. It let users to search any specific file directly from the search bar and users can preview the files from the tree structure panel and confirm the recovery done is successfully done or not.
Wrapping up
Before selecting any above-mentioned method never forget to take backup of your data files. Also, it is clear from the manual method described here that it required some technical knowledge because of it completely tricky. One wrong selection then entire data can be a loss. Yes, it is free of cost but yet time-consuming. Therefore select that method which is best suited for you.
About The Author:
As a Chief Technical Writer, I know the technical problems faced by office and professional users. So, I decided to share all my technical knowledge through this blog. I love helping you with tough challenges when dealing with technical issues.